2022.04.16 SAT
【Hiking • 013】
Roaring Tiger Rock River . Middle Kau Nga Hang . Kau Nga Ling
虎吼石河 . 中狗牙坑 . 狗牙嶺
This route is a legendary 『gold medal』 trek in Hong Kong, famous for its intense technicality and heart-pumping scrambles. It kicks off with a tough climb through the loose scree of Roaring Tiger Rock River (虎吼石河)」 and continues along the rugged ridges of Kau Nga Ling (狗牙嶺), where you’ll get massive 360-degree views of Shek Pik Reservoir (石壁水塘). The real adrenaline hits at the Single Lifeline (一線生機), a narrow, nerve-wracking ridge with steep drops on both sides, followed by the grueling vertical climb of Hades’ Wall (閻王壁). After passing the iconic Bird Rock (小鳥回頭) and hitting Chop Wood Hollow (斬柴坳), you’ll finally descend into Ngong Ping (昂坪), finishing a properly hardcore day out. The whole trek is about 10km long and takes roughly 6 hours to smash out—it’s pretty intense and definitely best suited for those with a bit of hiking experience under their belts.Hope you have a cracking time on this hike!
Shui Hau → Middle Kau Nga Hang → Tiger Roaring Rock River → Kau Nga Ling → Single Lifeline → Yim Wong Pik → The Bird Rock → Tsam Chai Au → Ngong Ping

Route Overview
Shui Hau → Middle Kau Nga Hang → Tiger Roaring Rock River → Kau Nga Ling → Single Lifeline → Yim Wong Pik → The Bird Rock → Tsam Chai Au → Ngong Ping
【Start】 The hike kicks off at Shui Hau. From here, head along South Lantau Road towards Tong Fuk before hitting the entrance to Middle Kau Nga Hang. You’ll pass a catchwater section first; once you enter Middle Kau Nga Hang, the terrain gets pretty rugged, so you’ll need to watch your step. It is a deep valley sandwiched between Middle Kau Nga / Middle Dog’s Teeth and East Kau Nga / East Dog’s Teeth, with the stream originating from the southern part of Lantau Peak.
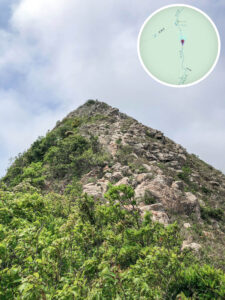
【Mid-section】 Next, you’ll reach Tiger Roaring Rock River, an epic stone river made of boulders that looks absolutely massive. These loose rocks were formed by the weathering of the neighboring Middle Kau Nga / Middle Dog’s Teeth and East Kau Nga / East Dog’s Teeth ridges — be extra careful with your footing here. Keep pushing up from the stone river until you reach Kau Nga Ling. The ridgeline ripples just like dog’s teeth; it involves a fair bit of scrambling and is quite technical, but the views are world-class. You will then cross the Single Lifeline, a super narrow ridge where you’ll definitely need to use both hands and feet to scramble across.
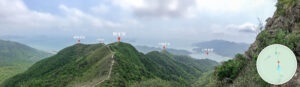
【Finish】 Keep grinding upwards until you hit Yim Wong Pik. It’s a steep, daunting rock face that requires a careful climb. After that, you’ll pass The Bird Rock, a scenic spot where you’ll need to take a detour. Finally, you’ll reach Tsam Chai Au. This marks your intersection with the Lantau Trail, where you can follow the path all the way down to Ngong Ping to finish the trip.

Here are the reference statistics for this journey:
Related Videos
Transport Guide
START
MTR Tung Chung Station
- Take 《Bus 11》, get off at Shui Hau (East) Bus Stop.
- Take 《Bus 23》, get off at Shui Hau (East) Bus Stop.

END

Route Breakdown
🚩
Outbound Route
《Shui Hau → Middle Kau Nga Hang → Roaring Tiger Rock River》
1. 📍 Shui Hau Village (East), Bus Stop
《巴士站》")
Shui Hau Village (East), Bus Stop
💡 P.S.:
- If needed, you can hit the nearby Shui Hau Public Toilet before you start the trek.
2. 📍 Lantau Trail – Section 10 《I》

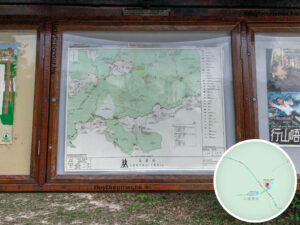
Lantau Trail – Section 10, Information Map

Distance Post L100
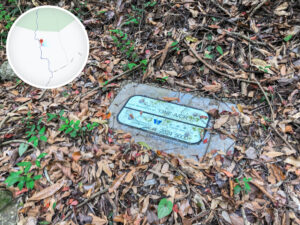
3. 📍 Distance Post L101

Distance Post L101
4. 📍 Lantau Trail – Section 10 《II》

Lantau Trail – Section 10 《II》
5. 📍 Lantau Trail – Section 10 《III》

Tong Fuk Catchwater / Shui Hau, Directional Sign

Lantau Trail Logo

Distance Post, Info Board
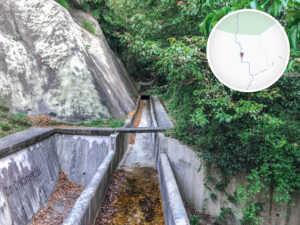
6. 📍 Tong Fuk Catchwater

Tong Fuk Catchwater
7. 📍 Distance Post LX317

Distance Post LX317
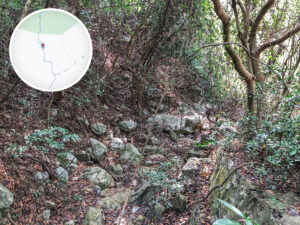
8. 📍 Middle Kau Nga Hang, Entrance

Middle Kau Nga Hang, Entrance
9. 📍 Middle Kau Nga Hang 《I》

Middle Kau Nga Hang 《I》
10. 📍 Middle Kau Nga Hang 《II》

Middle Kau Nga Hang 《II》
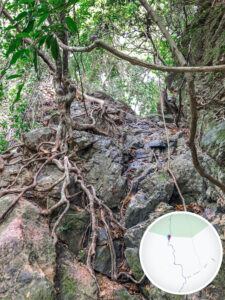
11. 📍 Middle Kau Nga Hang 《III》

First Scrambling Challenge
12. 📍 Middle Kau Nga Hang 《IV》


Middle Kau Nga Hang 《IV》
13. 📍 Middle Kau Nga Hang 《V》

Rocky Section
14. 📍 Middle Kau Nga Hang 《VI》

Middle Kau Nga Hang 《VI》
15. 📍 Middle Kau Nga Hang 《VII》

Middle Kau Nga Hang 《VII》
The scramble up Middle Kau Nga Hang continues, requiring you to scale several more towering slopes.
16. 📍 Middle Kau Nga Hang 《VIII》

Middle Kau Nga Hang 《VIII》
17. 📍 Roaring Tiger Rock River, Entrance

Roaring Tiger Rock River, Entrance 《I》

Roaring Tiger Rock River, Entrance 《II》

Roaring Tiger Rock River, Entrance 《II》
18. 📍 Tiger Roaring Rock River

Roaring Tiger Rock River 《I》

Roaring Tiger Rock River 《II》
Route Breakdown
🏁
Return Route
《Roaring Tiger Rock River → Tsam Chai Au → Ngong Ping》
19. 📍 Kau Nga Ling 《I》

Kau Nga Ling 《I》
20. 📍 Kau Nga Ling 《II》
Kau Nga Ling 《II》
21. 📍 Kau Nga Ling 《III》

Kau Nga Ling 《III》
22. 📍 Single Lifeline

Single Lifeline
‼️ Warning:
- This section is incredibly steep and narrow. You must be extremely cautious and watch every single step!
23. 📍 Yim Wong Pik

Yim Wong Pik 《I》

Yim Wong Pik 《II》
24. 📍 The Bird Rock


The Bird Rock
25. 📍 Tsam Chai Au
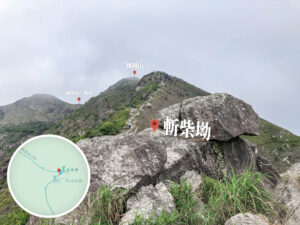


Tsam Chai Au
26. 📍 Lantau Trail – Section 3 《I》

Lantau Trail – Section 3 《I》
27. 📍 Distance Post L026


Distance Post L026
28. 📍 Lantau Trail – Section 3 《II》
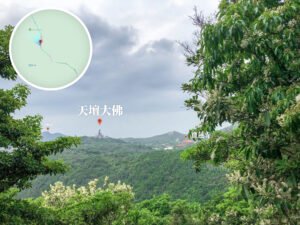

Big Buddha Views
29. 📍 Lantau Trail – Section 3 《II》

Viewing the Wisdom Path
30. 📍 Ngong Ping Plateau, Gateway

Ngong Ping Plateau, Gateway
31. 📍 Lantau Peak Sunrise, Gateway


Lantau Peak Sunrise, Gateway
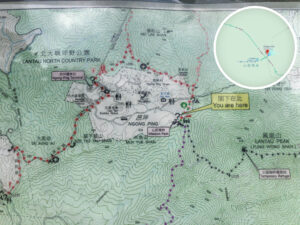
32. 📍 Lantau Trail, Information Board

Lantau Trail, Information Board
33. 📍 Wisdom Path
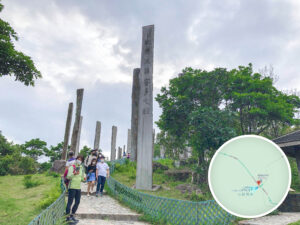
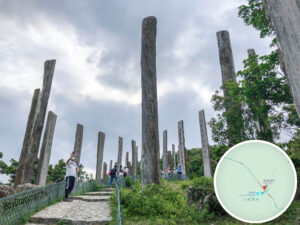
Wisdom Path
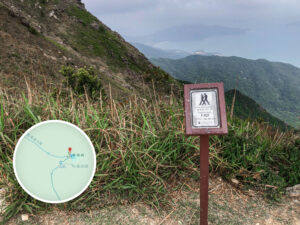
34. 📍 Lantau Trail – Section 3 → Ngong Ping Fun Walk

Wisdom Path, Stone Inscription
35. 📍 Ngong Ping Fun Walk 《I》

Ngong Ping Fun Walk 《I》
36. 📍 Ngong Ping Fun Walk 《II》
Ngong Ping Fun Walk 《II》
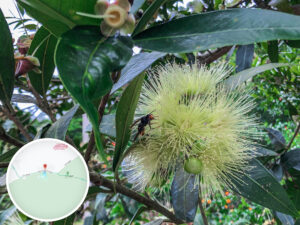
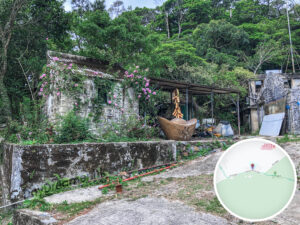
While walking along the Ngong Ping Fun Walk, I spotted a wasp! You’ll also pass some abandoned village houses that have been reclaimed by nature—it’s amazing how flowers can bloom right out of the concrete.
37. 📍 Ngong Ping Fun Walk → Ngong Ping Road

Ngong Ping Signpost
38. 📍 Ngong Ping Road 《I》
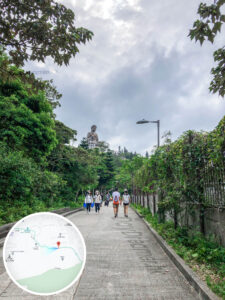


Looking up at the Buddha
39. 📍 Ngong Ping Pavilion

Ngong Ping Pavilion
Along Ngong Ping Road, you’ll pass a pavilion built in a very distinct traditional Chinese architectural style.
40. 📍 Di Tan and Po Lin Monastery – Archway

Di Tan and Po Lin Monastery, Archway
41. 📍 Ngong Ping Road 《II》


At the Foot of the Buddha
42.
📍
Ngong Ping Piazza

Ngong Ping Piazza
Past the Buddha, you’ll reach the Ngong Ping Piazza (昂坪廣場). The central path connecting the gateways is Bodhi Path (菩提路), which is lined with Bodhi trees and 12 statues of the 『Twelve Divine Heavenly Pastors』.
43. 📍 Ngong Ping Piazza, Archway


Ngong Ping Piazza, Archway
44. 📍 Ngong Ping Road 《III》


Ngong Ping Road
45. 📍 Ngong Ping Village


Ngong Ping Village
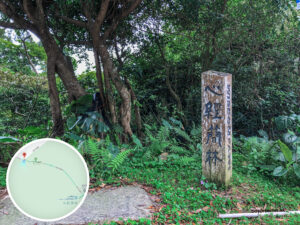
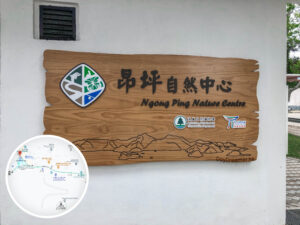
Pass through the archway and you’ve reached Ngong Ping Village. The Ngong Ping Nature Centre offers guided tours that cover famous landmarks and the Tree Walk leading to the Wisdom Path. It’s a great way to learn about native trees while enjoying the views. They also offer map and hiking pole rental services.
46. 📍 Finish: Ngong Ping, Bus Terminus
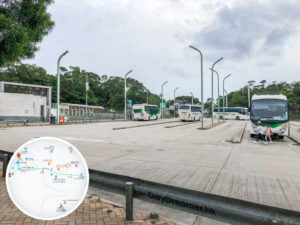


Ngong Ping, Bus Terminus
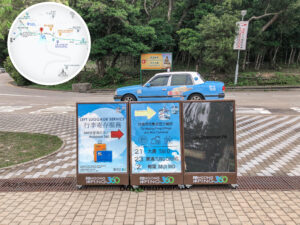
🚍 From here, you can take:
- 《Bus 23》 back to Tung Chung
- 《Bus 2》 to Mui Wo
- or 《Bus 21》 to Tai O
